Skip to content
How to Create a Practical Room Layout with AI
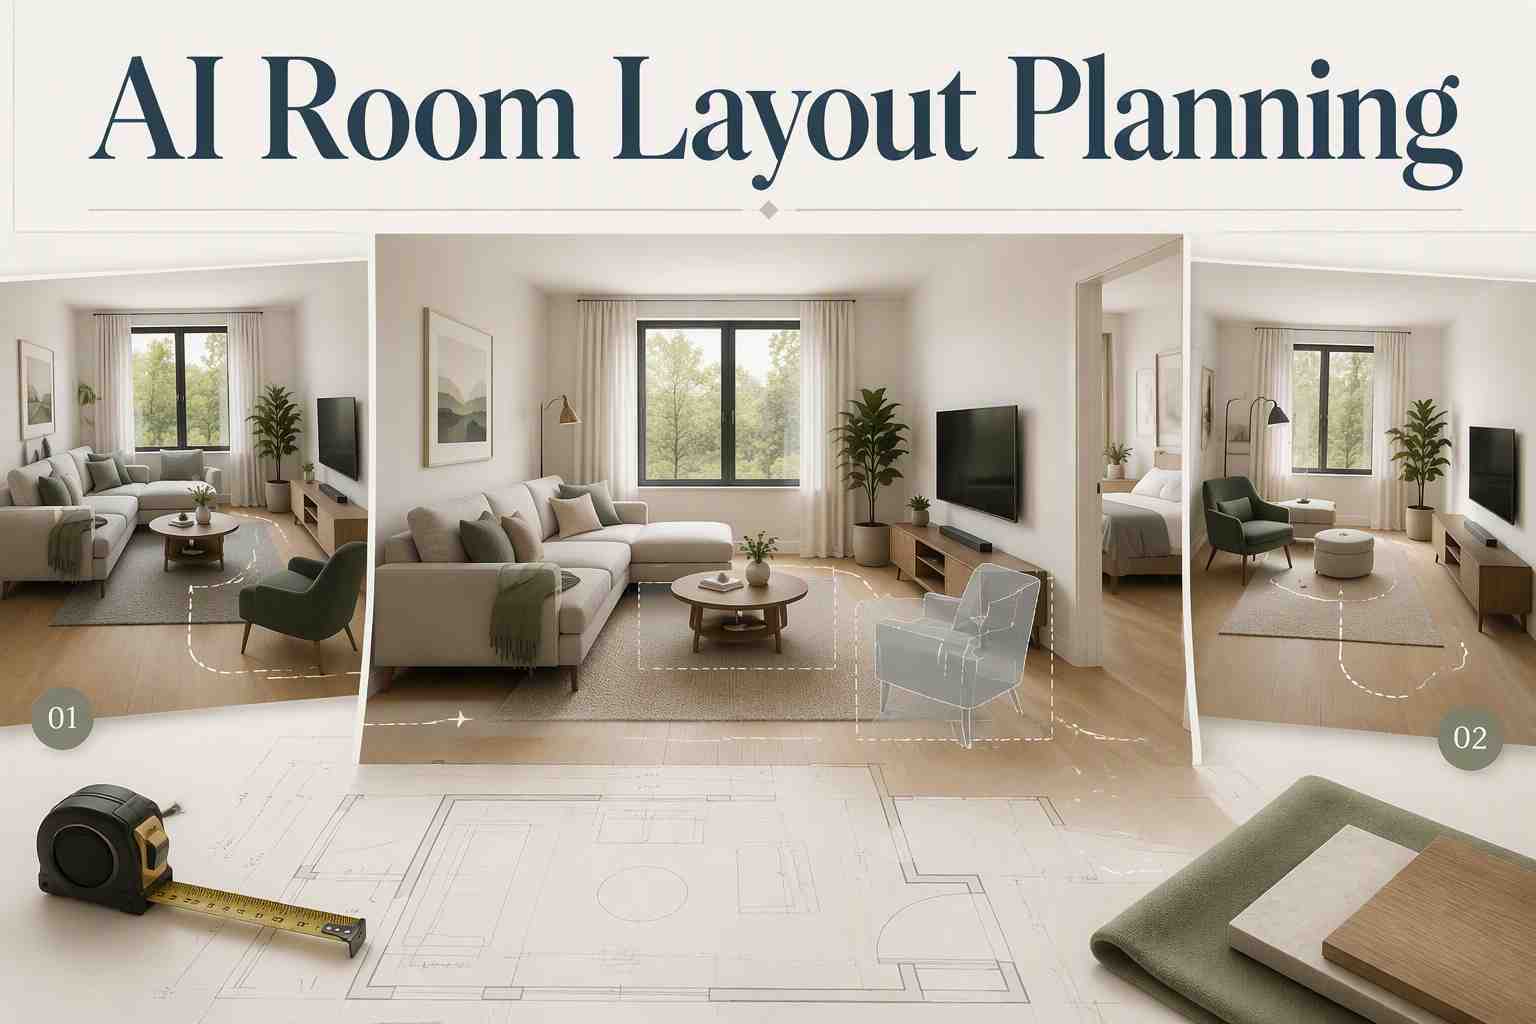
Room layout planning is not a contest to make a room look more expensive in a single render. It is a way to decide where people walk, sit, work, eat, sleep, store everyday items, and open doors without creating friction. EzRemove AI Room Design can help you upload a room photo, choose a room type and style, and add focused instructions so you can see different directions before buying furniture. Use the images as a decision aid, not as construction drawings. The useful outcome is a layout you can explain, measure, and live with.
This guide is written for renters, homeowners, and first-time DIY planners working with a real room rather than a blank showroom. It covers the practical decisions that make AI useful: what to photograph, how to define zones, how to request alternatives without confusing the tool, how to test a concept in the actual space, and what to do when the output is attractive but clearly impossible. The focus is layout planning and small-space optimization, not a catalog of design styles.
Know What AI Can Decide and What It Cannot
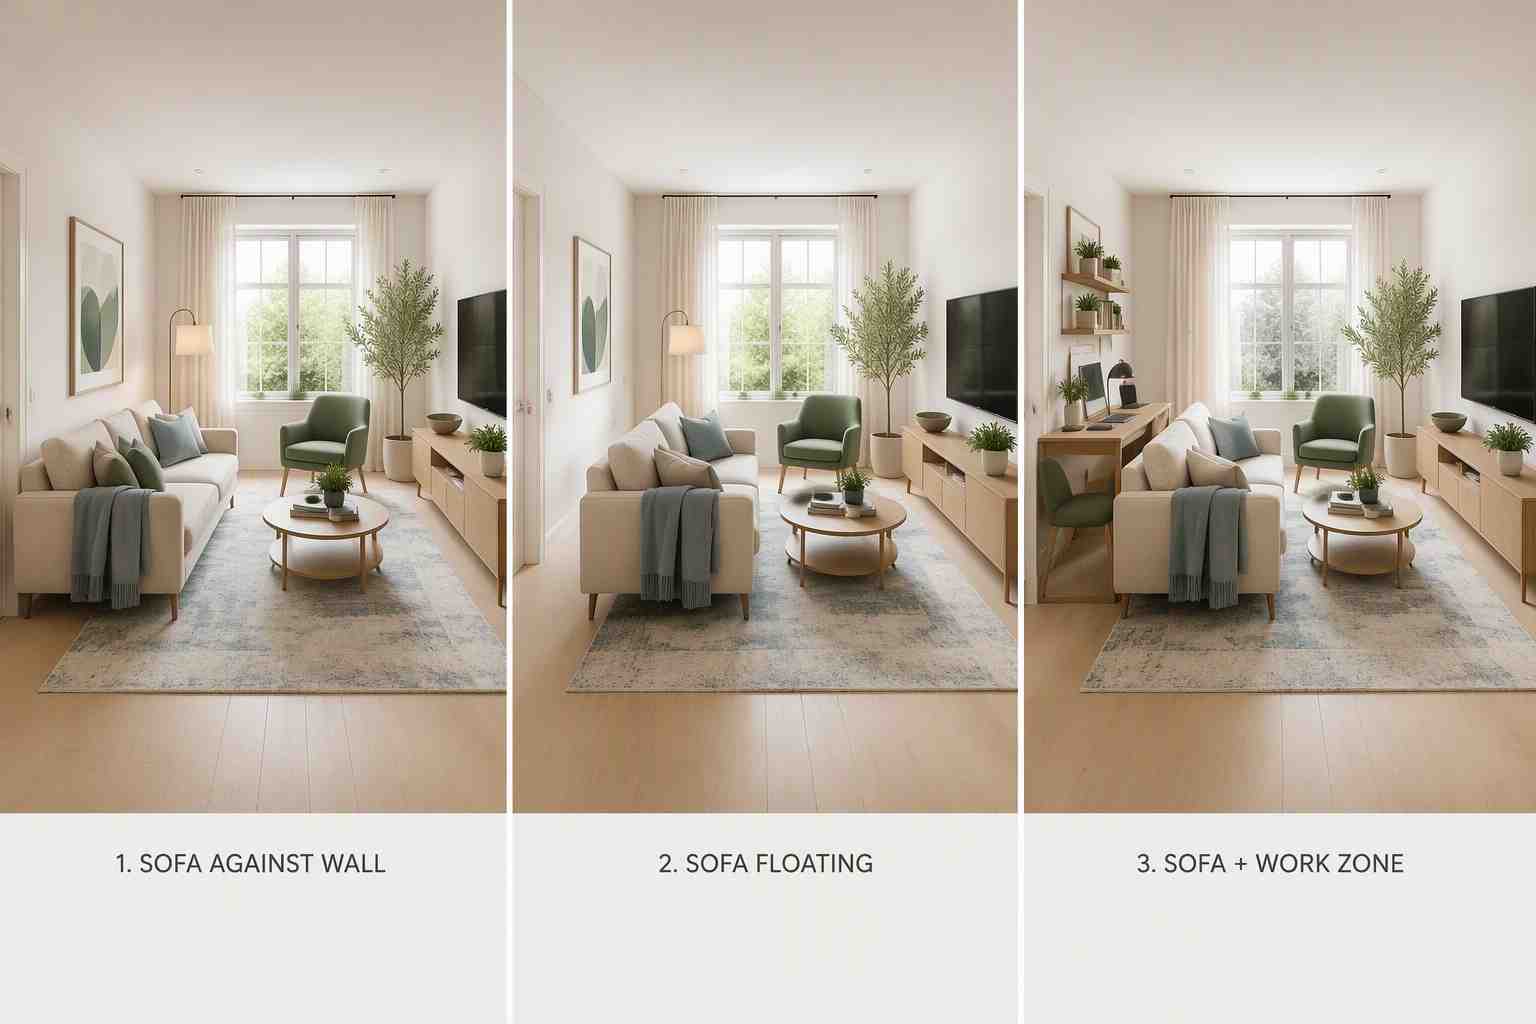
AI is strong at visualizing alternatives. It can help you compare whether a sofa against the long wall feels calmer than a floating sofa, whether a dining table overwhelms a studio, or whether a desk behind the seating area creates a workable zone. This makes room layout planning faster at the early stage, when you are deciding which possibilities deserve a closer look. Strong room layout planning is especially valuable when you cannot picture the consequence of moving one large item because the current room feels crowded or visually noisy.
AI is not a substitute for a tape measure, building code, a landlord's rules, structural advice, or a professional plan for a renovation. It cannot confirm that a cabinet door clears a radiator, that a hallway is accessible, or that a wall can support shelving. A render may also remove inconvenient details, widen a room visually, or introduce a piece of furniture that is smaller than it appears. Good room layout planning treats those errors as signals to test the concept rather than reasons to trust the image less thoughtfully.
Start with a clear division of labor. Let AI propose an arrangement, style direction, or furniture relationship. Let your measurements decide whether it fits. Let your routine decide whether it works. If the room is used for video calls, children, guests, exercise, or a pet, that daily behavior matters more than a dramatic before-and-after image. This approach protects you from a common mistake: redesigning for a photograph and discovering that the room no longer supports the life that happens inside it.
Build a Room Brief and Better Input Photo
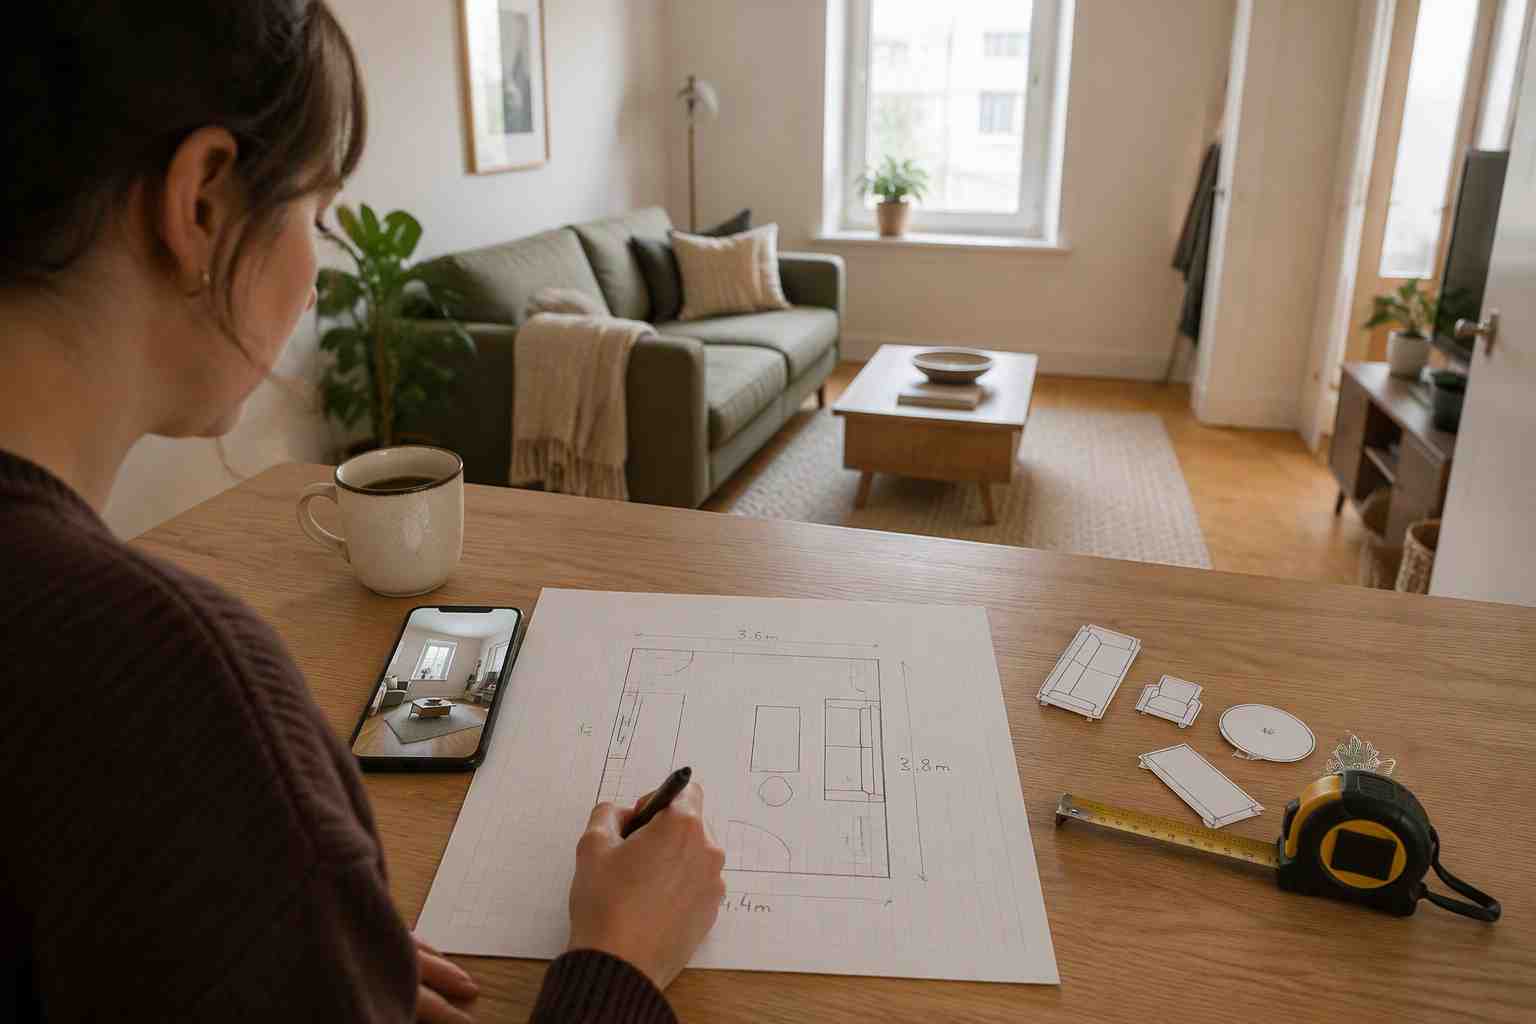
The first practical step in room layout planning is a room brief. Write down the room's primary job and its secondary job. For example, a living room may need to seat three people most evenings and become a work area twice a week. A bedroom may need calm sleep, daily clothing storage, and a clear route to a closet. This information is more useful than starting with a broad request such as "make it modern." It tells you which compromise is acceptable and which one is not.
Next, list every fixed feature that controls placement: doors, windows, radiators, air-conditioning units, vents, outlets, built-in storage, columns, and low ceilings. Measure the length and width of the room, then measure the footprint of any furniture that must remain. You do not need a perfect architectural drawing. A rough sketch with wall lengths, door swing, and major furniture dimensions is enough to make room layout planning concrete. Mark the routes people use most often, including the route from the entry to a window, bathroom, kitchen, or closet.
Your photo should show those constraints. Take it from a corner or doorway with enough daylight to reveal the walls and floor edges. Avoid extreme wide-angle distortion. Clear loose clutter only if it hides a fixed feature; do not remove the sofa, bed, or storage piece that determines the real problem. For a deeper walk-through of photo preparation, room type choices, and iterative prompts, use the step-by-step guide to designing your room with AI. The better the input represents the actual room, the less likely you are to plan around an illusion.
Finally, write two or three constraints in plain language. Examples include "keep the window accessible," "leave a path from the door to the desk," "reuse the existing bed," or "do not block the radiator." These constraints make room layout planning more precise without forcing the tool to solve ten unrelated requests at once. Keep the first generation simple enough that you can tell which instruction changed the result.
Turn Daily Activities into Clear Zones
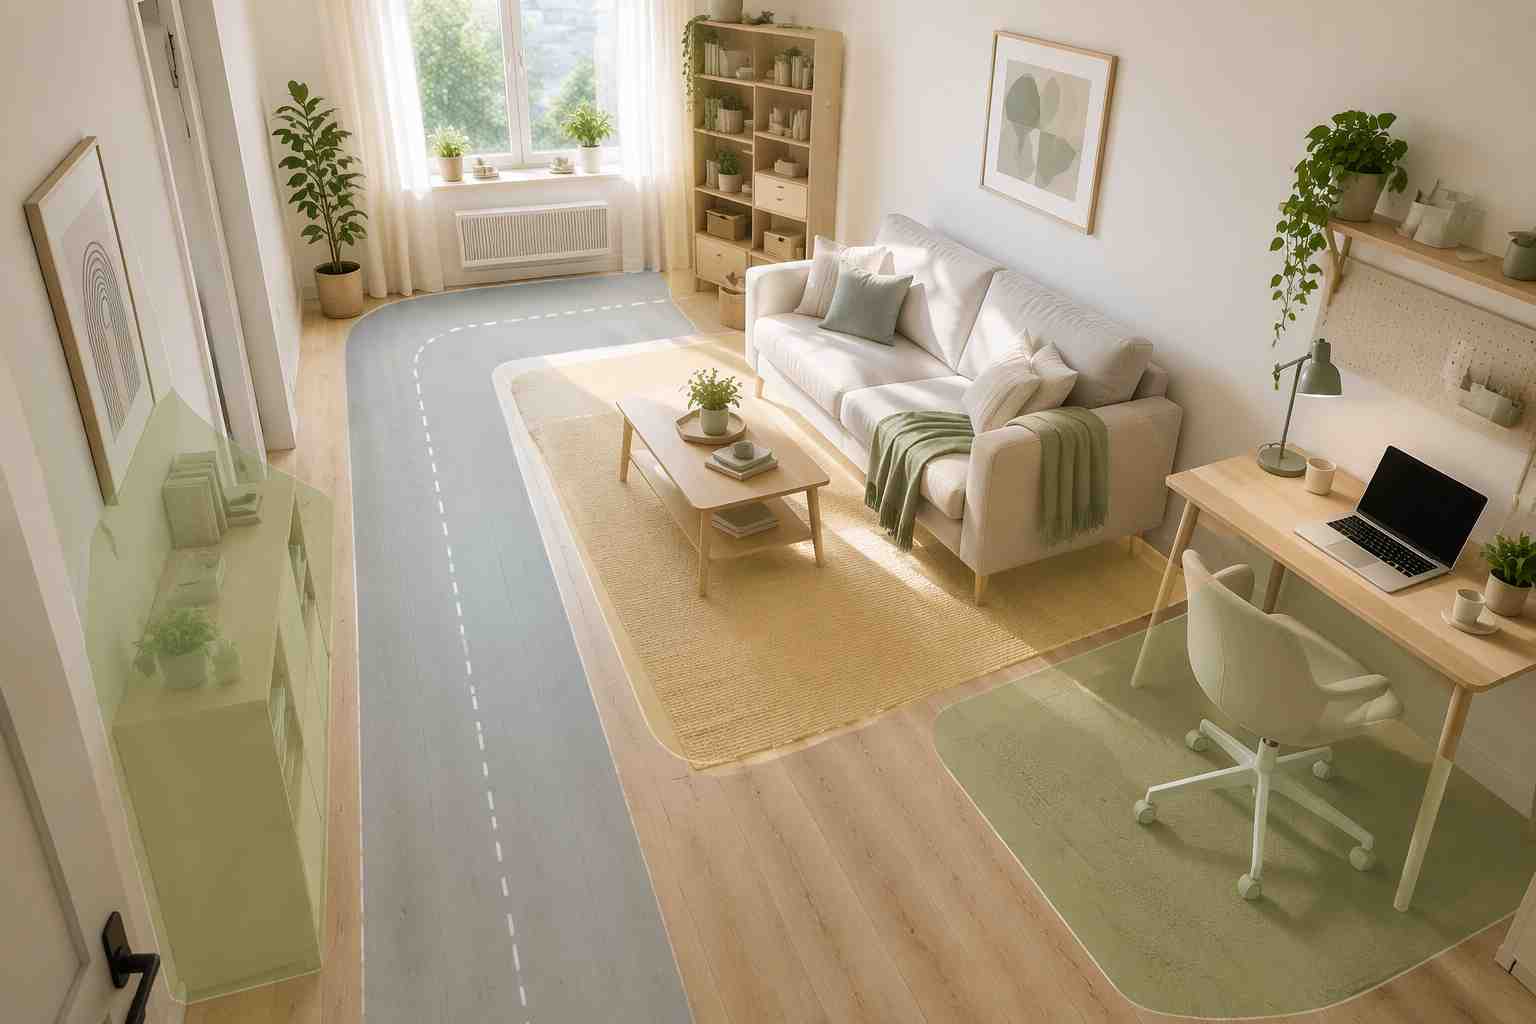
Most awkward rooms are not short on square footage alone. They are short on hierarchy. A sofa may be placed wherever it fits, a desk may be added wherever an outlet exists, and storage may accumulate wherever a wall is open. The result is a room with furniture but no clear purpose. Room layout planning gives each area a job before you decide its style. In a living room, that may mean a conversation zone, a media zone, a compact work zone, and a route through the room. In a bedroom, it may mean sleep, dressing, storage, and a landing place for daily items.
Assign a primary zone first. It should receive the best position, best light, or clearest relationship to the focal point. A living room meant for conversation may center on a sofa and chairs; a room used for television may need the viewing distance to guide the sofa position. Then assign supporting zones around it. The desk should not interrupt the path to the kitchen, and the dining surface should not make it impossible to open the front door. This order is the difference between room layout planning and simply arranging objects against every available wall.
Use a circulation rule while you sketch. Identify the one route that must remain easy every day and keep it free of furniture corners, open drawers, and temporary storage. Test it at the point where the room is busiest: entering with groceries, carrying laundry, pushing an office chair back, or walking to a closet in the dark. If a proposed piece compromises that route, give it a smaller footprint, move it to another zone, or remove it from the plan. A room can have a narrow passage, but the passage must still make sense for the people using it.
For a rental, the most valuable changes are often reversible: a narrower table, a movable floor lamp, a storage bench, or a rug that defines seating without adding a wall. The small living room layout ideas for rentals guide is a useful next step when you need focal-point options, low-commitment furniture arrangements, and ways to keep a small room flexible. It reinforces a key rule: a visually open room is not automatically functional unless the important route and activity zone are protected.
Generate Comparable AI Layout Options
Once you have a brief and zones, use AI to compare alternatives rather than generate endless unrelated images. Room layout planning becomes much more useful when each version answers one question. Ask for the same room photo, the same main function, and the same fixed features, then vary one layout decision. For example, compare a wall sofa with a floating sofa, a round coffee table with no coffee table, or a desk behind the sofa with a wall-mounted desk. Changing one variable makes the output easier to evaluate.
Keep style instructions secondary at first. A prompt that asks for Scandinavian style, warmer lighting, hidden storage, a reading nook, a work desk, a dining corner, a media wall, new curtains, and a different sofa will often return a mood board disguised as a layout. Start with the room type, the primary activity, and one spatial instruction. Add a style only after the zones feel credible. This protects room layout planning from becoming a collection of beautiful but contradictory images.
| Planning question | Focused instruction | What to inspect after generation |
|---|---|---|
| The entry feels blocked | "Keep a clear route from the door to the seating area" | Door swing, bag drop zone, and the narrowest point of the path. |
| The room does double duty | "Create a compact work zone behind the sofa" | Chair clearance, monitor glare, and outlet reach. |
| The room feels crowded | "Use a smaller coffee table and preserve open floor space" | Whether the open area improves circulation or only removes needed surface space. |
| Storage is taking over | "Add closed storage without blocking the window" | Cabinet depth, window access, and what happens to daily items. |
Use descriptive constraints instead of vague approval language. Say "keep the existing bed on the longest wall" rather than "make the bedroom better." Say "leave the walkway from door to closet visible" rather than "make it spacious." Then generate two or three versions. Compare them side by side and name the difference you see. If you cannot describe why one is better, return to the brief; the issue may be an unclear priority rather than a weak render.
It also helps to use an exclusion. Tell the tool not to add a second seating group, not to block the window, or not to replace a fixed piece. These small guardrails give room layout planning a realistic boundary. They are particularly valuable in a studio or a small rental, where one incorrect new object can consume the only clear route through the room.
Translate a Good Render into Measurements
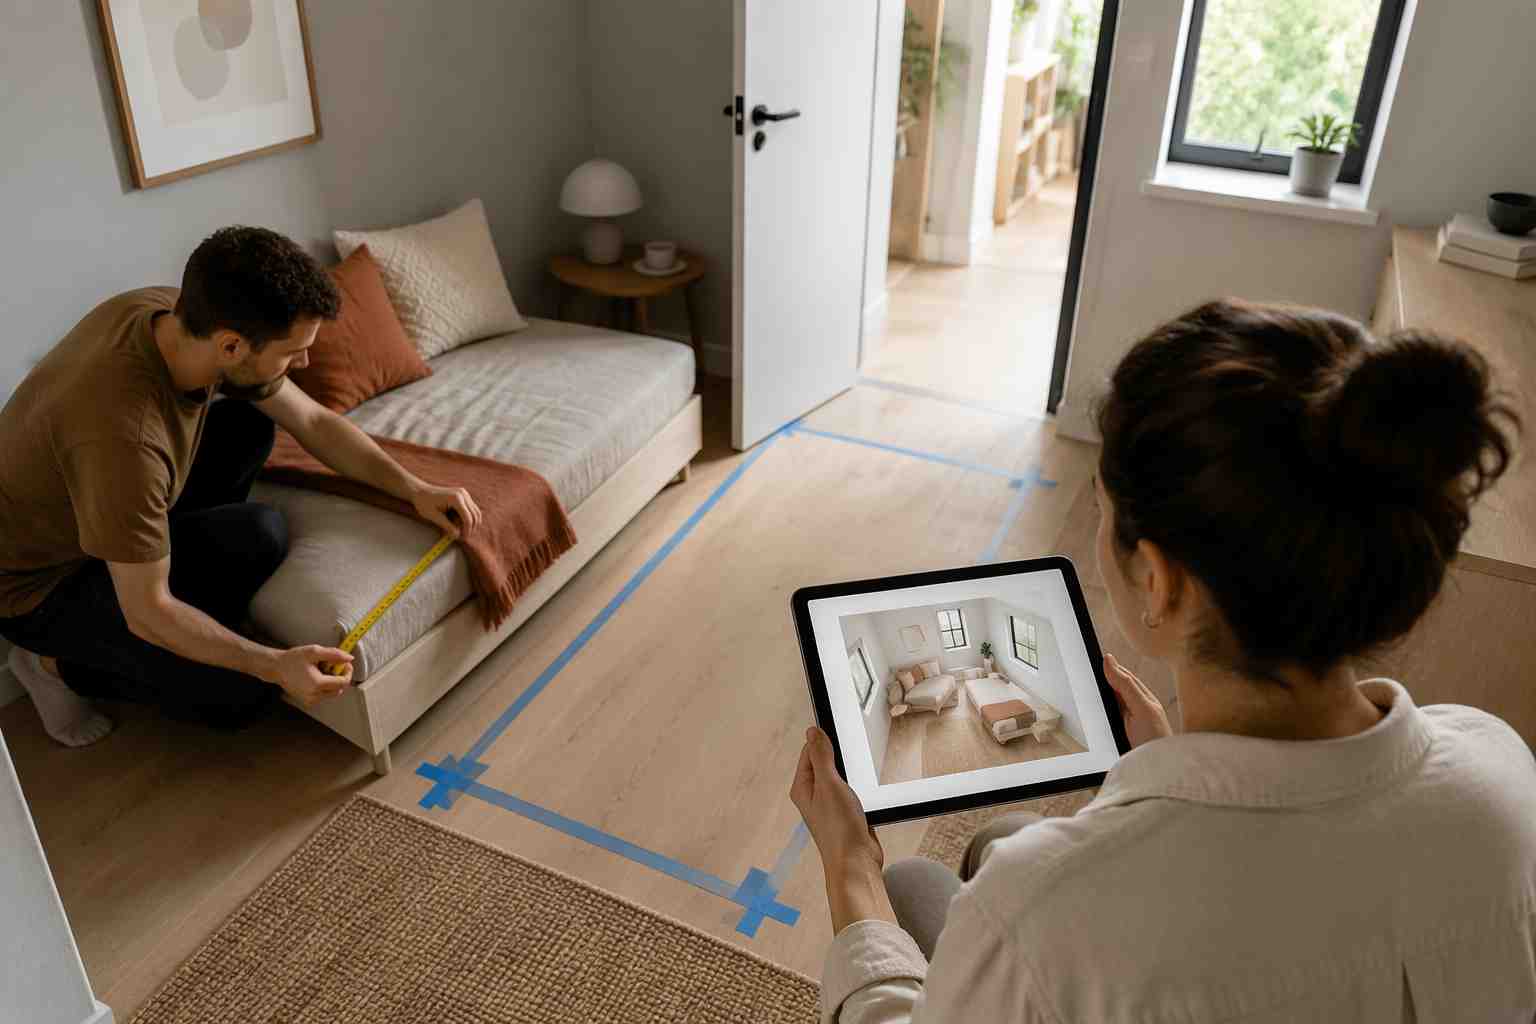
The most important room layout planning step happens after you find an image you like. Choose one candidate and turn it into a measurement test. Record the width and depth of every large item in the render: sofa, bed, table, desk, cabinet, and chairs. Then use painter's tape, cardboard, books, or the actual furniture to mark its footprint on the floor. The test does not need to look elegant. It needs to reveal whether people can pass, sit down, open a drawer, and use the room without a daily obstacle.
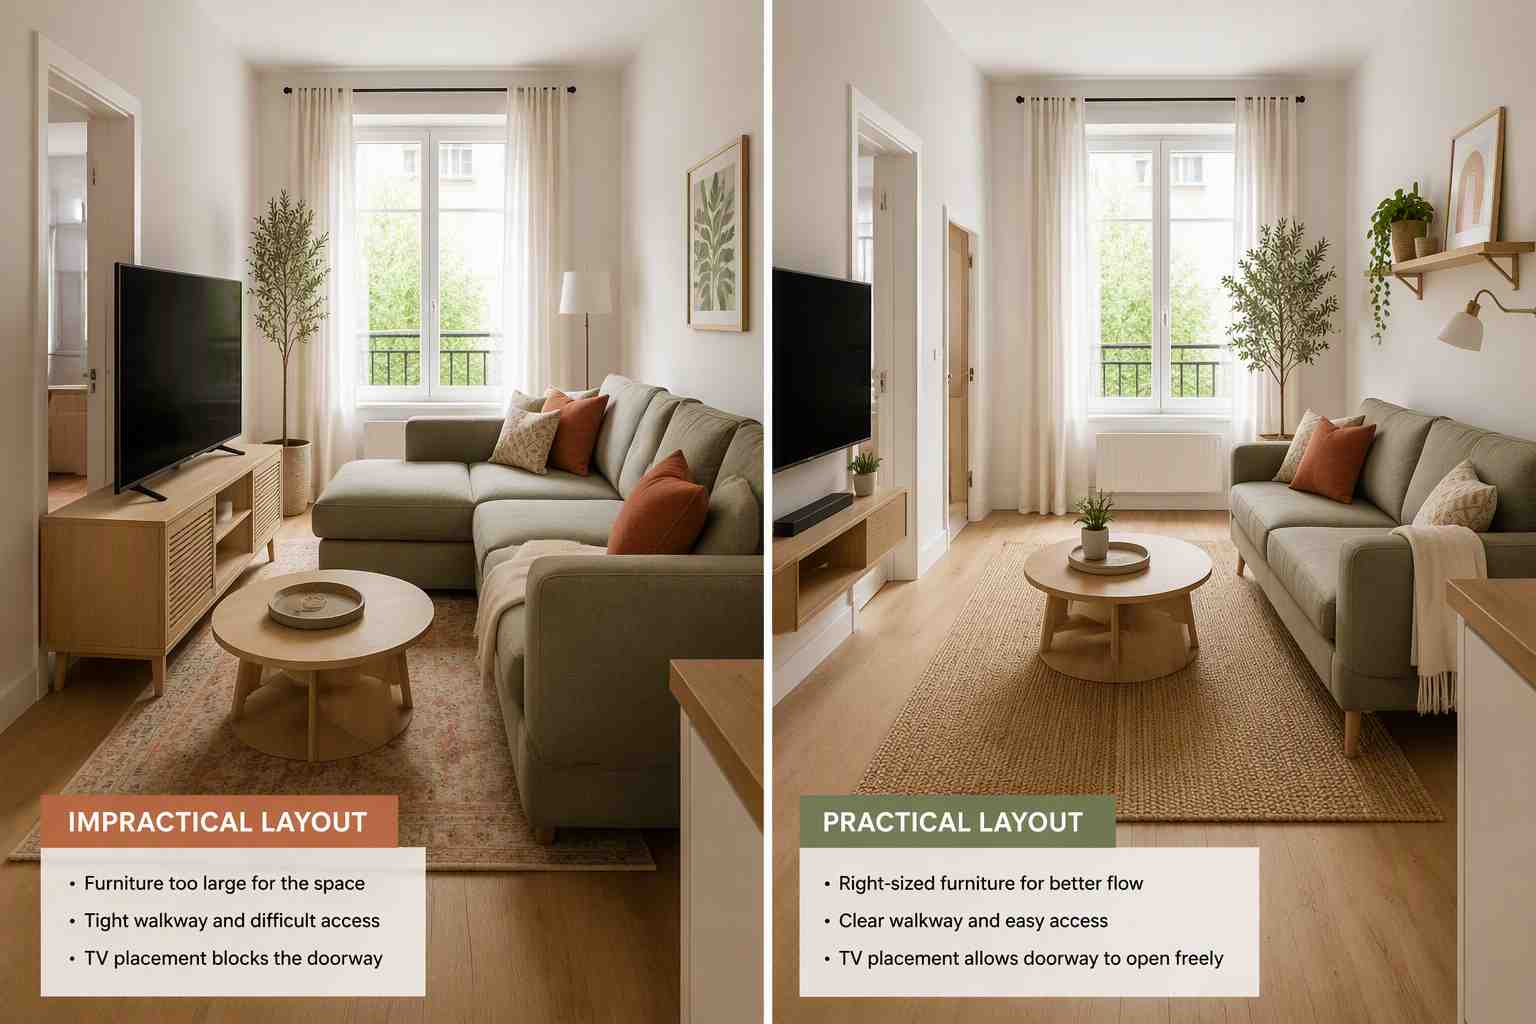
Start with the largest item because it controls the rest of the layout. In a bedroom, the bed position determines where drawers, nightstands, and closet access can go. In a living room, the sofa position determines the viewing distance, traffic flow, and space available for a coffee table. Check door swing before you check decor. A beautiful storage solution that prevents the front door from opening fully is not a solution. Check windows, heating, vents, and outlets next, because these details are easy for a render to simplify or hide.
Use a practical three-pass test. First, walk the route with empty hands. Second, walk it while carrying what you commonly carry: a basket, a laptop bag, a vacuum, or groceries. Third, use the supporting furniture as intended. Pull the chair out, open the drawer, unfold the sofa bed, or sit at the desk. This turns room layout planning from a visual exercise into a small real-life rehearsal. If any step feels tight, adjust the footprint before you search for a new product.
Optimize a Small Room Without Overfilling It
Small-space room layout planning is not about fitting the maximum amount of furniture into the room. It is about making each item earn the floor area it occupies. Start by protecting the largest uninterrupted patch of open floor. That open area may look unproductive on paper, but it makes a small room easier to enter, clean, and use. It also gives the eye a place to rest, which is why a room can feel calmer even when the furniture count has not changed.
Choose furniture that solves more than one problem only when the second function does not make the first worse. A storage ottoman can provide a surface, extra seating, and hidden storage. A narrow console can create a landing zone without taking the depth of a desk. A wall-mounted light can free a nightstand. But a bulky storage bed may fail if its drawers open into the only walkway, and an oversized sectional may eliminate the seating flexibility you wanted. Good room layout planning compares usable dimensions, not just product features.
In a small bedroom, begin with bed clearance and daily storage. Leave enough access to make the bed, use the closet, and reach the window. Then decide what should stay visible and what needs closed storage. The small bedroom layout and storage ideas guide can help when you are balancing a bed, clothing storage, lighting, and a compact work surface. Its most useful principle is restraint: vertical storage can help, but leaving some blank wall and floor space can stop a functional room from feeling packed.
Use scale clues in the render carefully. A slim-legged chair may make a room look lighter, but it still needs its full seat depth and pull-out clearance. A round table can improve a tight route because it removes sharp corners, but it may offer less surface area. An open shelf can make a wall feel less heavy, but it demands tidy daily habits. When you make these trade-offs visible, AI room layout becomes a way to test priorities rather than a promise that every feature will fit.
Score the Options Before You Buy Anything
By now, you should have two or three realistic options rather than one idealized picture. Score each option against the brief. Give it a simple pass, caution, or fail for circulation, primary activity, storage, light, and budget. You do not need a complex spreadsheet. The point is to avoid choosing an arrangement just because it looked better in one render. Room layout planning succeeds when the preferred layout is also the one you can explain in practical terms. This room layout planning scorecard keeps taste from overruling usability.
Ask five questions before you commit. Can everyone enter and leave without turning sideways? Can the main activity happen without moving a chair first? Can doors, drawers, and windows still open? Is there a home for the items that currently create clutter? Does the option require a purchase that you have not measured or budgeted for? A single fail does not always reject the layout, but it tells you what needs changing. A smaller table, different desk orientation, or reduced storage depth may resolve the problem without starting over.
Keep one backup option. This is useful if the preferred sofa is unavailable, the desk does not fit once delivered, or your landlord will not allow a wall-mounted change. Room layout planning is more resilient when it includes a fallback that preserves the same primary zone and walkway with a different piece. Save the best images, your brief, and the measurement notes together. That record prevents you from repeating the same comparison every time you reconsider the room.
Recover When the AI Result Looks Good but Fails
When an AI result fails, diagnose the kind of failure before you regenerate. If a fixed feature is missing, retake the photo from a better angle. If the layout ignores a priority, shorten the prompt and put the spatial constraint first. If the tool keeps changing the room too aggressively, ask it to preserve the current room structure and alter only the furniture arrangement. This gives room layout planning a deliberate feedback loop instead of an endless series of prompts.
Some failures come from mixing two decisions. Style is one decision; circulation is another. A request for a warm Japandi studio with a desk, dining area, guest seating, hidden storage, and a clearer entry may need two passes. First ask for the functional zones and protected walkway. Then keep the stronger layout and ask for the palette, materials, and decor direction. Separating those steps helps you notice whether the improvement came from a true layout change or simply better lighting in the image.
Be skeptical of any result that removes the things you actually own. If the render works only because it replaces your bed, ignores your media unit, or hides your laundry storage, revise the brief to include those conditions. The goal is not to prove that a perfect room exists. The goal is to find the best version of your room with its real constraints. That is why the strongest room layout planning process includes retakes, smaller requests, and honest measurement checks.
Frequently Asked Questions About AI Room Layout Planning
Can AI create a floor plan I can hand to a contractor?
Use AI images for early visualization and discussion, not for a construction-ready plan. Room layout planning with a photo tool can help you define the arrangement and style direction you want, but structural changes, electrical work, permits, and exact specifications need qualified professional input. Bring your measured notes and preferred concept to that conversation rather than relying on a render alone.
Is AI useful for a rental or a very small apartment?
Yes, especially when you need reversible changes and cannot picture alternatives in a limited footprint. Use the process to test a smaller table, a different sofa orientation, a storage wall, or a work zone without moving everything first. Keep the brief focused on existing walls, doors, and rental limits. AI is most helpful when it helps you reject a bad purchase before it arrives.
How many layout versions should I generate?
Start with two or three versions per question. More versions do not necessarily improve the decision if every prompt changes the style, furniture, and layout at the same time. Generate one set for circulation, another for storage, and then one refinement for the strongest option. That gives you enough contrast to learn without creating comparison fatigue.
Make the Final Decision in Your Real Room
The final version should be the one that supports everyday life, not the one with the most dramatic AI transformation. Confirm the clear route, the primary activity, the furniture footprint, storage, light, and cost. Then make one change at a time so you can tell what improved the room. Once your chosen option has passed a real measurement test, return to EzRemove AI Room Design to preview its room type, style, and focused instruction before buying or moving anything. This final room layout planning check keeps the process connected to the room you actually have while leaving room to explore a better version of it.